Showing posts with label Dessert. Show all posts
Thursday, 12 July 2012
Chocolate covered coconut macaroons
The world is going mad for macarons, the multi-coloured garish almond based meringue confections popular for afternoon tea around the world. Since I started working in London, I've seen swathes of tourists clutching pastel paper bags from the likes of Laduree. They're not the kind of thing that you find in Somerset!
I'm partial to the odd macaron; they're cute, (dare I say) girlie and wonderfully bite-sized. However, they are a bit of a pig to bake. Achieving that light and fluffy texture is rather unpredictable, much like the somewhat troublesome meringue. If you're in need of a tasty sweet snack, maybe it would be better to by-pass the chichi and look a little closer to home.
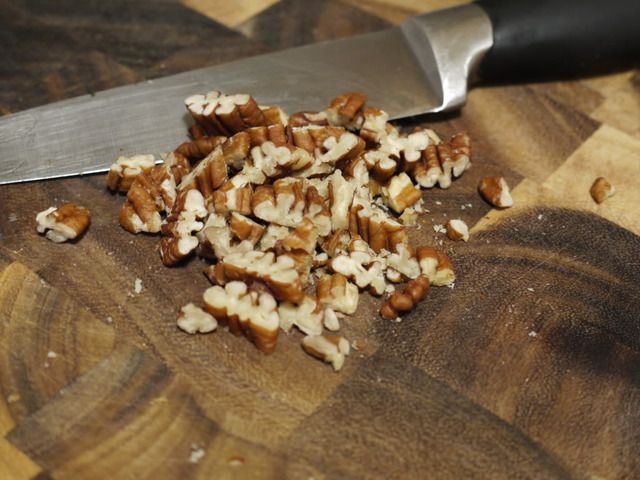
Macaroons (note the double 'o') are easy to throw together and provide the same deliciously sweet hit without the kitchen faff. According to the wonder that is Wikipedia, English macaroons and French macarons share the same Italian word maccarone or maccherone which derives from ammaccare meaning to crush or beat. Don't run away in horror; this refers to the crushed nuts that are the main ingredient of both recipes. Both are cousins of amaretti, the crunchy Italian almond biscuit. It's a very European affair.
I adore this recipe because it really is so simple. Bung the ingredients together, shape and pop in the oven. Decoration is optional but I like any excuse to mess around with chocolate. I've made these several times and they're an ideal mid-week bake because they're quick and easy to make out of ingredients that tend to lurk in the back of the larder. Oh and they're naturally gluten free too!
Coconut macaroons
Makes 16 – 20
2 egg whites
300g unsweetened grated coconut (or the same of desiccated coconut)
3 tbsp runny honey (omit if using desiccated coconut)
To decorate
150g dark chocolate
10 glacé cherries (optional)
- Preheat oven to 180C and line a baking tray with a silicon or greaseproof paper.
- Whisk together the egg whites and honey (if using).
- Add the coconut and stir until coated.
- Scoop out tablespoon dollops of mixture, compact slightly and evenly space on baking tray.
- Bake for 10 – 12 minutes or until golden brown.
- Remove to a wire rack and allow to cool.
- Melt the chocolate in a heatproof bowl over a pan of boiling water.
- Meanwhile, halve the cherries so that they’re ready to garnish.
- Dip the flat base of each macaroon into the chocolate and place on a tray covered in silicon or greaseproof paper. If you want a particularly luxurious macaroon, allow these to cool and dip again.
- Drizzle the top of the macaroons with melted chocolate and garnish with a half cherry, dipped in a little chocolate to act as glue.
Labels:
Baking,
Chocolate,
Cookery,
Dessert,
Food,
Gluten Free,
Recipe,
Store Cupboard Chic,
Sweet,
Vegetarian
Friday, 1 June 2012
Low Fat Berry Banana Muffins
As the long weekend approaches, you might be on the lookout for delicious recipes. If we can’t rely on the weather, we might as well ensure that we have tasty things to eat. Whether you’re in need of something for a Jubilee street party or searching of a healthy breakfast treat, this easy muffin recipe is versatile and a great way to get a portion of fruit.
This recipe is low in fat and isn’t as sweet as the processed versions that you’ll find in coffee shops and supermarkets. It’s a great way to use up those forlorn overripe bananas too! The bananas help to keep the muffins nicely moist but don’t provide an overwhelming banana flavour which means that you can chop and change the flavour combinations.
I filled mine with cheap frozen mixed berries from the supermarket but you can add any that you fancy. Go for classic blueberry muffins or add half cherries and half almonds for a summery, seasonal twist.
I think I’ll be packing a few for a weekend bike ride for a little slow release energy!
Berry-nana muffins
Yields 12 muffins
150g whole grain flour
150g self-raising flour
1tsp bicarbonate of soda
100g light muscovado sugar
50g porridge oats, with a little more for garnishing
2 medium bananas, peeled and mashed
300ml low fat yoghurt
5 tbsp sunflower oil
2 egg whites
300g fresh or frozen berries
- Preheat the oven to 180c.
- Line a 12 hole muffin tin with paper muffin cases or squares of greaseproof paper (mine were approximately 10cm x 10cm).
- Mix the flours, bicarbonate of soda, sugar and oats together.
- In a separate bowl, combine the mashed banana, yoghurt, oil and egg.
- Make a well in the dry ingredients and pour in the liquid mixture. Stir quickly but gently to bring everything together. Don’t panic if the batter looks a little lumpy.
- Gently fold in the berries and divide between the muffin cases, sprinkling each one with a little oats.
- Bake for 18 – 20 minutes until golden brown.
Looking for a way to use up those unwanted egg yolks? Why not make mayonnaise for your weekend barbecues and sandwiches?
Saturday, 5 May 2012
Sticky Toffee Bread and Butter Pudding
Sometimes the simplest combinations are the best. Salty Cheddar cheese paired with sweet and sour Branston pickle, for example, or sweet ripe tomatoes combined with aromatic basil leaves. Both examples are far more than the sum of their parts. Bread and butter is another classic duo which are endlessly versatile; they work as an accompaniment with all sorts from scampi to jam.
I must admit that I was never drawn to the British classic, bread and butter pudding, when I was young. I always associated bread with savoury flavours and so, the idea of adding it to a sweet dish didn't compute. How wrong I was! It's such an easy dessert to make and is very forgiving if you feel the need to bend the recipe to your culinary whims. For my recent al-fresco-feeding-of-the-many-people moment at Cronkshaw Fold Farm, I added a luxurious sticky toffee element - as a nod to another British classic - but you could omit the deliciously sticky dates and caramel sauce for dried cranberries and white chocolate instead. Raisins and nuts would work well too. Or you could go for a virgin version and revel in simple stodgy comfort food. Either way, hot or cold, this ones a winner.
One of my lovely friends (I only have lovely friends, you understand) is gluten intolerant, just like my dear Mum, so my version was made - very successfully, I might add - with gluten-free bread. The custard binds everything together so that the bread, which without gluten is usually very dry and crumbly, was soft and moreish.
Sticky Toffee Bread and Butter Pudding
Serves four (multiply at will)
For the pudding
150g pitted dates
½ tsp bicarbonate of soda
50g butter
10 slices of bread (brown, white, granary – the choice is yours)
400ml milk
2 eggs
25g sugar (plus 1 tbsp to top the pudding)
1 tsp vanilla extract
For the sauce
100g sugar
100g butter
100ml cream
- Preheat the oven to 180C.
- Put the dates and bicarbonate of soda in a small saucepan and top up with water until just covered. Place over a low heat and simmer until the dates have broken down, stirring occasionally. Once the process is complete, they will look alarmingly like tar but fear not, as they taste amazing. Remove from the pan and set aside.
- Meanwhile, whisk the eggs and sugar together until creamy. Set aside.
- Once the dates have completely collapsed and you've emptied the pan, pour the milk into the saucepan and place over a low heat to warm through. This has the double benefit of infusing the milk with the toffee notes of the dates while making the pan easier to clean (as well as reducing washing up!).
- While the milk is warming, butter the bread then smear with a little date mixture and cut diagonally into triangles.
- When the milk has come to temperature, whisk slowly into the eggs and sugar.
- Place a few slices of the buttered bread into a baking tin, slightly overlapping them as you go. If you have any of the date mixture leftover, add a smear or two of that. Repeat the layers until you've used up all of the bread.
- Slowly pour the egg mixture over the bread and leave it to soak for 30 minutes or so. You might want to press the bread down into the mixture so that it soaks up all of the custard-y goodness.
- Scatter with the reserved sugar and bake for 40 - 45 minutes until golden brown and crisp on top.
- While the pudding is in the oven, melt the sugar in a saucepan over a low heat. Stay on the ball here or you’ll end up with a burnt mess. The edges will start to melt first – as soon as the first centimetre or so starts to turn golden brown remove from the heat and whisk the butter into the mixture.
- Next pour in the cream and return to a low heat, whisking constantly to remove any lumps. Add a pinch of fleur de sel or sea salt if you’re feeling fancy and want to go for a de rigueur salted caramel sauce.
Labels:
Baking,
Cheap Eats,
Cookery,
Dessert,
Food,
Fruit,
Gluten Free,
Recipe,
Store Cupboard Chic,
Sweet
Thursday, 19 January 2012
Pineapple and mango upside-down cake - sunshine on a plate!
Do not adjust your display settings. I thought I'd bring you a little edible sunshine in Spring! It this doesn't cheer you up after the freezing, wet days that we've had, I don't know what will! When you think of seasonal food at this time of year, your thoughts might fall to comforting root vegetables but tropical fruits are in their prime right now. Admitedly, they're not grown in the UK so there are a lot of food miles involved but if you're going to buy them, you might as well have them when they are at their best!
Pineapples, mangoes and passionfruits are all in season so I decided to combine them in one tasty cake for a fund-raising event at work. I adore pineapple upside-down cake so I thought that I would go one better and marry all of these exotic beauties together with a hint of lime in this famous retro dish. Its incredibly easy but the results are fantastic plus my colleagues mentioned that it tasted virtuous because each bite was filled with fruit. I'll cast no illusions - this isn't a healthy cake but I'm glad that it felt good to eat.
I'd also like to highlight the fantastic (even if I do say so myself) glaze that gives the cake it's glossy day-glow yellow tone. This stuff is so so morish; it's unreal! It's well worth the faff of sieving the passionfruits - my top tip is to microwave the fruit for less than a minute before halving them as it helps to encourage the pulp to slide out. If I'd have been making this cake for me, I would have been tempted to keep the pips in but as it happened, I stirred them into yoghurt for pudding as they have a lot of flavour. I'm tempted to make the glaze to top cheesecakes or to drizzle on pannacota in future.
Pineapple and mango upside-down cake with lime and passionfruit glaze
Makes 10 servings
For the topping (or should that be... bottoming...?)
1 mango
1 227g can of pineapple (packed in juice) or ¼ fresh pineapple
60g butter, softened
60g golden caster sugar
For the cake
150g butter, softened
150g caster sugar
150g flour
3 eggs
1tsp baking powder
1 tsp vanilla extract
1 lime
3 passionfruits
- Preheat oven to 180C. Line a 20cm by 20cm square deep baking tin (or a 25cm round baking tin) with greaseproof
- Start with (what will eventually be) the topping by creaming the butter and sugar together then smearing into the bottom of the pan. Skin the mango and drain the pineapple (retaining the juice for later) then arrange by pressing the pieces into the butter-sugar mix. Make a pretty pattern or go geometric... the choice is yours!
- Next make the sponge base by creaming the butter and sugar together until light and fluffy. Add the zest of the lime and the vanilla extract.
- Add the eggs one by one, beating well between each addition then fold in the flour and baking powder.
- Spoon the cake batter over the fruit and gently shake the tin from side to side to encourage the mixture to get between the fruit pieces.
- Bake for 35 minutes or until the sponge is firm and a knife/skewer comes out clean.
- Meanwhile, pierce the passionfruits and microwave them for 30 seconds or until they are warmed through. Halve and scrape out the pulp then sieve out the seeds (you don't have to do this if you don't want to but it depends if you want the seeds to pepper your cakes caramel topping or not). Press the pulp through a non-metalic sieve with a spoon or similar for the best results.
- Simmer the passionfruit pulp with the reserved pineapple juice and the juice from the lime until it has halved and become thick and sticky.
- When the cake is ready, remove from the oven and set aside for five minutes before turning out onto a plate. Drizzle or brush with the glaze and ideally serve warm with coconut icecream.
Tuesday, 3 January 2012
Peach, Pear and Almond Pavlova
Happy New Year, my foodie friends! I’m afraid that I suffered with a “festive cold” over Christmas which meant that, instead of getting online and telling you how awful I was feeling, I decided to stay in bed (apart from a few misguided days when I went to work) and concentrate on getting better. Hope you don’t mind!
Despite my illness, I enjoyed my break and loved spending a whole ten days at home (proper Somerset home! Yay!) with The Boy and our families. We were given a gorgeous pasta maker by my grandmother so we’ve been mastering fresh pasta during the holidays. I’ve been pleasantly surprised by how easy it is to make and am now on the lookout for pasta dishes to match our tender sheets.
We spent New Year ’s Eve with good friends that The Boy and I went to school with. Our evening characterised the simple yet successful entertaining equation of great company plus delicious food (divided by optional banter, multiplied by reminiscing) equals wonderful evening. I was tasked with providing a pudding and with a glut of egg whites leftover from festive baking, the choice was clear. It was pavlova time. I made mine slightly more virtuous by substituting the traditional whipped cream with half fat crème fraiche.
I find that whipped egg whites can be something of a wild card ingredient. My top tips for limiting egg white disasters? I would recommend using a painstakingly clean glass or metal bowl (rubbed with a lemon if you’re really superstitious) for whisking in and be sure that your whisk is really clean too. Separating eggs can require a steady hand too so I break the egg over a mug or bowl to catch the egg whites before transferring them individually to the mixing bowl. That way, if a yolk happens to break, it only affects one egg (keep it for scrambled eggs or a cake) rather than your whole bowl – sods law says that its always the last egg when all of the others have separated perfectly!
Peach, Pear and Almond Pavlova
Serves 6 – 8
4 egg whites
225g caster sugar
1 tsp cornflour
1 tsp white wine vinegar (optional)
4 pears
1 star anise
1 cinnamon stick
1 vanilla pod
1 tin of peaches in juice
200ml apple and mango (or fruit of your choosing) juice
50g almonds
300ml half fat crème fraiche
25g icing sugar (or to taste)
Dark chocolate to decorate (optional)
- Preheat the oven to 180C. Cover a baking sheet with grease proof paper or baking parchment.
- Whisk the egg whites until they are just stiff and form shiny peaks. Ideally you want to do this with an electric mixer but if you don’t have one, you can do it by hand.
- Gradually add the caster sugar a couple of tablespoons at a time, whisking gently but thoroughly between spoonfuls.
- Once all of the sugar has been added, continue to whisk for a few minutes until the mixture is stiff and glossy. Fold in the corn flour and vinegar (if using) at this stage.
- Smooth onto the prepared baking tray (using a few blobs of meringue mixture under the parchment to keep it in place if necessary). The mixture needs to be about 4cm thick and it’s best if the outsides of your chosen shape are higher than the middle – I find the easiest way to do this is to gently smooth out the middle rather than piling up the sides. Of course, you could be fancy and pipe the meringue to make it look really pretty.
- Pop in the oven and immediately turn down to 120C. Bake for one and a half hours then leave in the oven until completely cool.
- Meanwhile, peel, core and quarter the pears. Drain the peaches, reserving the canning juice and set aside.
- Put into a saucepan and pour in enough juice (from the peaches as well as your chosen juice) to cover. Add the star anise and cinnamon. Slice open the vanilla pod lengthways (scrape out the seeds with a teaspoon and set aside) and add the empty pod to the pan.
- Poach the pears over a medium heat, keeping the pan to a gentle simmer, for around 15 minutes or until the pears are pleasantly soft. Remove from the poaching liquor and turn up the heat to reduce it to a syrup – this will take another 10 – 15 minutes or until thickened.
- Mix the crème fraiche, vanilla seeds and icing sugar. Taste and add more sugar if necessary then spoon on to the meringue base.
- Pop the almonds into a frying pan over a low heat and toast for a few minutes until slightly darker. Keep a close eye on them and don’t let them burn as they’ll become bitter.
- Arrange the fruit on top of the crème topping and intersperse with the toasted almonds. Scatter with grated chocolate to decorate. Serve drizzled with the poaching liquor syrup.
Labels:
Baking,
Cookery,
Dessert,
Food,
Fresh Produce,
Fruit,
Gluten Free,
Recipe,
Sweet
Monday, 12 December 2011
Dark Chocolate and Bitter Cherry Brownies with Salted Caramel Glaze
Now that I’m London-based and taking the train every day, I’ve taken to reading the free papers and after a month, it’s now firmly in my commuting routine. Metro in the morning, Evening Standard during the post-office dash – day in, day out. But on Tuesday evenings, something beautiful happens. For Tuesday’s are the day that Stylist magazine is handed out at choice locations across the UK. It’s a fantastic free women’s weekly magazine aimed at city ladies with, well, style. As one of my lady friends described it, “Stylist rocks. I’d pay for it – it’s that good! But I don’t have to.” Even better.
I don’t pass any of the distribution points on my normal route so I am forced to divert in order to pick up my copy and get my weekly hit. This week, I didn’t manage to detour on my way to a dance class so I ended up coveting a fellow Tube travellers copy for a good twenty minutes – looking lovingly at the cover across the aisle – before she alighted and – RESULT! – left the object of my affections behind.
This week’s copy was edited by Nigella Lawson and featured a rather emotive image of the lady herself dripping with salted caramel. This would normally be a complete turn-off for me as I can’t really stand the woman (The Boy and I have bonded over our joint disgust of her visibly sexual imagery, la-de-da tones and smug smile) but I turned the page as usual. Surely Stylist wouldn’t fail me, I thought. And I was right.
I liked the entire issue but in particular, it discussed a long-standing point of curiosity for me. Salted caramel. I’ve never been sold on the concept of sweet and savoury combined in this form, which I suppose is pretty strange when you consider that I like sweet chilli sauce, cheese and pineapple on sticks and sweet and sour stir-fries. Nigella wrote some predictably filthy prose about “her obsession” (honestly, the poor girl can’t even write one ‘clean’ page – who else could include “saliva-spurting lips” and “ménage-á-trois” in a food column?) with the stuff but the idea festered with me until I was drawn to try it out. We’d both enjoyed a hint of saltiness in Source’s Cherry and Salted Caramel Brownie so I thought that I would attempt my own recipe.
Don’t be under any illusion about just how bad these are for you. But the odd occasional indulgence can’t do you any harm. They’re seriously gooey and sticky but can still be eaten with fingers (Nigella-style sultry digit-licking compulsory). Make them a day ahead of time to let the caramel soak in.
Dark Chocolate and Bitter Cherry Brownies with Salted Caramel Glaze
Makes 16 – 20 brownies
For the brownies
100g unsalted butter, softened
150g golden caster sugar
2 large eggs
75g plain flour
1 tsp baking powder
3 tbsp milk (or cream!)
75g dried sour cherries
50g dark chocolate, chopped
100g unsalted butter, softened
150g golden caster sugar
2 large eggs
75g plain flour
1 tsp baking powder
3 tbsp milk (or cream!)
75g dried sour cherries
50g dark chocolate, chopped
For the caramel (adapted from Nigella's version)
40g unsalted butter
25g soft light brown sugar
25g golden caster sugar
25g honey
60ml double cream
1 tsp sea salt (fleur de sel if you have it) or to taste
40g unsalted butter
25g soft light brown sugar
25g golden caster sugar
25g honey
60ml double cream
1 tsp sea salt (fleur de sel if you have it) or to taste
- - Preheat the oven to 180C and line a 20cm square tin with greaseproof paper
- - First, it’s time to make the caramel. Melt the butter in a pan over a low heat with the sugars and honey, stirring occasionally to encourage the sugar to dissolve.
- - Once it is smooth, raise the temperature and let the caramel gently bubble up. Keep a close eye on it at this point as it can burn easily; I like to remove it from the heat every minute or so to and give it a good stir to stop it catching. It’s ready when it starts to thicken and darken.
- - Remove from the heat and add the cream, stirring constantly to combine into a smooth sauce. Once you have done this, take a little caramel on a spoon and set it to one side to cool – if it completely solidifies, add a splash of milk as you want the caramel to be semi-liquid at room temperature.
- - Scatter the salt over the caramel and stir well to combine. Taste to check the salt levels and add more if you fancy it. Beware that the caramel may be very hot so don’t burn your mouth! Set aside.
- - Beat the butter and sugar together in a bowl until fluffy and then add one egg at a time, whisking well between each addition.
- - Sift the flour, cocoa and baking powder into the bowl and then gently stir in. Add the milk to loosen then fold in half of the cherries and all of the dark chocolate.
- - Spoon into the prepared tin and level. Using half of your prepared caramel, add dollops to the brownie batter in the tin. Loosely swirl the caramel into the batter but don’t overdo it as it’ll just mix in.
- - Bake for 25 minutes or until the top has puffed up a little and has set.
- - Remove from the oven and leave to cool for 15 minutes then stud with the remaining cherries (I like to squidge them right into the soft brownie but be more decorative if you wish) and then glaze with the remaining caramel.
Friday, 2 December 2011
Stir up... Friday!
Are you feeling Christmassy yet? No? Neither am I. But I have a plan! Since I was a little girl, my darling mother has made Christmas cake and pudding for us every year. I have fond memories of watching her weigh out her tried-and-tested mixture of dried fruits before grating in the zest of oranges and lemons and finishing with a generous measure of brandy. The smell of brandy still reminds me of the first rich mouthful of iced cake which I would squeeze in on top of the other sumptuous Christmas fare.
Stir up Sunday may have just passed but it's not too late to start soaking your fruit for your Christmas cake. It's a great way to get into the spirit of things, probably because all the alcohol fumes are enough to make anyone feel at least a little bit merry. You can ease yourself into what can be a marathon cooking season.
First, find a suitable vessel - a large sweet jar with a lid is ideal but a large bowl with a saucepan lid or plate over the top works too. Then pick your fruit; go for whatever you'd like and appeals to you. For a standard size cake and pudding, you'll need around 1.5kg of fruit. I adore dried and glacé cherries so I will be throwing a few of those in along with some plump juicy raisins, some snipped up dried dates, figs and peel. Pop them into your jar or bowl and fetch your chosen tipple. Generally, its sherry or brandy but again, there aren't any rules here and if there are, they are made to be broken. You don't have to go for something alcoholic as tea or fruit juice taste delish too. No matter what you choose, my tip would be to have one of whatever you're giving the fruit yourself - for research purposes, of course. My Mum always added the zest and juice of an orange or two as well. Pour over enough to cover the fruit and you're done! Simply stir the mixture every few days and keep in a cool dark place like your larder cupboard or fridge.
Happy Friday!
Tuesday, 13 September 2011
Summer Fruit Crumble and Homemade Spiced Custard
Autumn commeth. I can feel it in the air; there's a chill breeze (or gale, as it's been in the last few days!), the leaves are starting to turn from lush green to crisp yellows and oranges and every so often you get the faintest whiff of mulching leaves and drying conkers. I must admit that I struggle to keep warm at the best of times so as the weather turns colder, I'm looking forward to warming my cockles with some lovely home cooking.
Summer Fruit Crumble
Serves 6
For the filling
450g prepared summer fruits of your choice
or 2 cooking apples, cored and chopped
4 plums, stones removed and chopped
4 pears, cored and chopped
2 tbsp sugar
For the topping
50g plain flour
50g rolled oats
50g unsalted butter, chilled and cubed
50g caster sugar
- Preheat the oven to 180c.
- Place the prepared fruit in a baking dish and sprinkle with the sugar.
- Pulse the topping ingredients in food processor, or rub together with your fingers, until it resembles bread crumbs.
- Pile on top of the fruit and pop into the oven for 30 - 40 minutes or until the fruit is bubbling and the topping is golden.
Spiced Homemade Custard
Serves 2 - 4
330ml milk
1 cinnamon stick
1 star anise
1 cardamom pod, crushed
1 vanilla pod or 1 tsp vanilla extract
2 egg yolks*
15g caster sugar
1 level tsp cornflour
grated nutmeg to taste
- Split the vanilla pod length ways and scrape out the seeds. If you're using vanilla extract, hold your horses - you add this later. Add the seeds, pod and other spices to a saucepan and pour in the milk. Cover and gently bring to the simmer. Keep a close eye on it as milk has a mischievous tendency to boil over as soon as you turn your back. When it's warmed through, remove from the heat and allow to cool a little. This stage can be done in advance - the longer the better as the spices will infuse the milk.
- When you're ready to serve, whisk the yolks, sugar and cornflower together in a bowl until nicely blended and creamy.
- Remove the vanilla pod (if using) and the spices and pour the milk over the egg yolk mixture, whisking all the time so that the mixture is lump-free.
- Return the mixture to the pan (with the vanilla extract if using) and stir gently over a very low heat until it is thickened to your liking.
The days may be getting shorter and darker but, thankfully, Summer's not completely gone (truthfully, I'm not sure if it ever arrived in the UK). The limited amounts of watery British sunshine haven't limited the supply of fruit and vegetables in the garden's, allotments and veggie patches of my family and friends. We've been gifted boxes and bags full of delicious home grown goodies; most recently, my Mother-in-Love filled a box with apples, pears, rainbow chard, mangetout, runner beans and a carton of home-grown home-juiced apple juice. Unfortunately, after a busy weekend, I put the box on top of the car to rearrange the mess on my passenger seat only to forget about it completely. I promptly remembered it after driving a third of a mile and hearing it slide across the roof and land, with a thunk, in the middle of the road. Whoops. Luckily, the produce were a little worse for wear but still edible.
Our bruised and bashed apples and pears were combined with some plums to make a delish crumble. Crumble, for me, is up there with mashed potato and hearty soups as possibly the best comfort foods of all time. It's versatile, quick and easy (prerequisites of pretty much all of my recipes). This time, I decided to challenge myself and try making custard. We often keep a can of the ready made stuff in the larder for emergencies (emergency apple pie, emergency pineapple-upside-down cake...) but I've never tried making it from scratch. Now that I've given it a go, I can say with some confidence that it's amazingly easy. It takes about 10 minutes to make - no more than microwaving a can of the ready made gloop.
Serves 6
For the filling
450g prepared summer fruits of your choice
or 2 cooking apples, cored and chopped
4 plums, stones removed and chopped
4 pears, cored and chopped
2 tbsp sugar
For the topping
50g plain flour
50g rolled oats
50g unsalted butter, chilled and cubed
50g caster sugar
- Preheat the oven to 180c.
- Place the prepared fruit in a baking dish and sprinkle with the sugar.
- Pulse the topping ingredients in food processor, or rub together with your fingers, until it resembles bread crumbs.
- Pile on top of the fruit and pop into the oven for 30 - 40 minutes or until the fruit is bubbling and the topping is golden.
Spiced Homemade Custard
Serves 2 - 4
330ml milk
1 cinnamon stick
1 star anise
1 cardamom pod, crushed
1 vanilla pod or 1 tsp vanilla extract
2 egg yolks*
15g caster sugar
1 level tsp cornflour
grated nutmeg to taste
- Split the vanilla pod length ways and scrape out the seeds. If you're using vanilla extract, hold your horses - you add this later. Add the seeds, pod and other spices to a saucepan and pour in the milk. Cover and gently bring to the simmer. Keep a close eye on it as milk has a mischievous tendency to boil over as soon as you turn your back. When it's warmed through, remove from the heat and allow to cool a little. This stage can be done in advance - the longer the better as the spices will infuse the milk.
- When you're ready to serve, whisk the yolks, sugar and cornflower together in a bowl until nicely blended and creamy.
- Remove the vanilla pod (if using) and the spices and pour the milk over the egg yolk mixture, whisking all the time so that the mixture is lump-free.
- Return the mixture to the pan (with the vanilla extract if using) and stir gently over a very low heat until it is thickened to your liking.
*Not sure what to do with your leftover egg whites? Make meringues or pop them in a mug in the fridge until tomorrow when I'll be putting up a new recipe that will use them up!
Tuesday, 5 July 2011
Raspberry & White Chocolate Cheesecake
I like to think that this recipe is slightly more virtuous than your average cheesecake. Whether it actually is or not is neither here nor there... It’s made up of reduced fat cream cheese and a dairy product called Quark, which is far less alien than it sounds. It’s virtually fat free and doesn’t have any of the bitter, grittiness than you often get with fat free yoghurt or cream cheese. These two ingredients alone won’t solidify so to this you add the naughtiest ingredient – white chocolate. I’m not a huge fan of white chocolate on its own but it certainly makes this cheese cake for me. Fold in some raspberries (fruit therefore healthy) and spread over a base of reduced fat biscuits and crushed nuts (also good for you).
When I was looking for a heavenly cheesecake recipe without the sinful calorie or fat, I came across lots of baked cheesecake recipes but none that involved chilling to set the cake. I've tried baked cheesecakes and they're great but they do add another level of complication to the process. They're temperamental; if you don't bake them a certain way, they can crack which doesn't affect the taste but does make them look a bit unsightly. This cheesecake is pretty much fool proof and is a great dinner party dessert that can be made in advance.
I think this would also work with dark chocolate and cherries if you’re looking for a variation. I would use the darkest chocolate possibly to ensure that the cheesecake doesn’t set a strange grey colour. Swirl in some kirsch or maybe Bailey’s for a more adult version.
Raspberry & White Chocolate Cheesecake
Makes 12 servings
300g reduced fat cream cheese
500g Quark
300g white chocolate 200g British raspberries
2 tsp vanilla extract
55g butter
1 tbsp cocoa powder
50g reduced fat digestive biscuits
30g mixed nuts
- Preheat your oven to 180c. Prepare a 25cm spring form tin by lining the base with parchment and the sides with clingfilm.
- Melt the butter gently over a low heat or in the microwave.
- Pulse the biscuits and mixed nuts in a food processor until they are finely chopped. If you don't have a food processor, chop the nuts as finely as you can and bash the biscuits, wrapped up in a clean tea towel, with a rolling pin.
- Stir the cocoa powder into the butter and add the biscuit and nut crumbs.
- Press into the bottom of the tin with a flat bottomed tumbler as evenly as possible and bake for 10 minutes. Set aside to cool.
- Melt the chocolate in a heat proof bowl over a pan of boiling water then leave to cool slightly.
- Meanwhile, mix the cream cheese and Quark together until combined then add the cooled melted chocolate and vanilla extract. Beat together and then add the raspberries.
- Pour the mixture on top of the biscuit base and level with a spatula. I like to push any raspberries that have ended up on the surface to the bottom and smooth the creamy mixture around them to give a smooth top.
- Chill for two hours or until firm.
Monday, 13 June 2011
Simple Home-baked Scones
When a few friends came over to visit this weekend, the last thing that I was expecting was for one of my male friends to bring his craving for cream teas all the way over from Hampshire. This is a guy who likes mountain biking and sailing. And fast cars. And shoot-em-up pew-pew-pew computer games. He’s no less macho than your average man and yet he craves little cakes with cups of tea. Not that I’m suggesting anything, of course.
Anyway, a rainy post-mojito Sunday morning dawned and it was clear that no one wanted to leave the warm and dry of our flat in search of tea and cake. Instead, I got out my trusty scone recipe and threw together a batch. They’re so simple to make – preparation takes about 10 minutes or so and they don’t take much longer to bake. Within half an hour, you can be munching on warm scones.
Please don’t bother with the supermarket versions that are available; I’ve always found them to be a tremendous disappointment. Dry, crumbly and tasteless. Homemade scones are amazingly easy and so worthwhile for the flavour alone. Serve with clotted cream and strawberry jam for an authentic feel or go for whipped cream if the divine clotted kind isn't available. Just as lovely with butter, of course, though not quite as decadent. Top with a few British strawberries if you're feeling fancy (or if they were going cheap at the supermarket, like us!)
Sultana Scones
Makes 8 - 10
225g self raising flour
40g unsalted butter, at room temperature
1 ½ tbsp caster sugar
Pinch of salt
125ml semi-skimmed milk
50g sultanas
- Preheat oven to 220C
- Sift the flour over the butter in a large mixing bowl. Rub the two ingredients rapidly between your fingers to bring it together, taking care to break down any lumps. The mixture will have an almost sandy texture once you’re done.
- Add the raisins, sugar and salt and stir in with a table knife.
- Pour the milk into the bowl, a little at a time, mixing it in with the knife. The mixture will come together as you add the milk. You might not need to add all of the milk if the pastry is coming together nicely. If it looks a little dry, add a splash more milk.
- Flour a pastry board or (in my case) a clean worktop and roll out with a floured rolling pin. The pastry should be about ¾ inch thick. Cut your desired shapes – I used a floured glass but you can go as wild as you like with your pastry cutters.
- Pop the scones onto a parchment covered baking tray and bake for 12 – 15 minutes until golden brown.
- Allow to cool for a few minutes and serve warm with cream or butter and jam.
Friday, 27 May 2011
Bramley Apple Cupcakes
A lovely way to get some of your five-a-day?
Tomorrow is my birthday. I'm not saying this for sympathy or for want of balloons but to justify my late-night baking.
In the British workplace, it seems to be customary for the birthday boy or girl to bring in cakes or biscuits for their colleagues. This, to me, seems like backwards logic; it's your birthday so surely others should be treating you? Anyway, I don't mind because it means that I get to bake.
Bramley apples are in season so you can buy them cheaply in most supermarkets. There's someone in the village where I grew up who has a tree that bears fruit at this time of year and they have so much that they don't know what to do with it so they pile it up on their garden wall for passers-by to get. The fruit is just lovely but has to be cooked as they're a lot more acidic that your run of the mill dessert apples. A lesson learnt from biting into a crisp apple on my way home. Our addiction to sugary foods has extended to fresh fruit with our supermarket shelves are filled with watery, sweet imported fruit from the likes of the USA and New Zealand. Bramleys mellow and sweeten as they are cooked so they're well worth the effort. They're fantastic in crumbles, yummy in apple sauce and add a certain something to mashed potato if you're serving it with pork. Very versatile, very tasty and in season so don't hold back.
For my birthday baking, I decided to treat my workmates to another take on apples. Apple cupcakes! There's very little butter or egg required in this recipe, which makes me feel more virtuous. The grated apple keeps the cake very moist so you won't miss them. I also substituted some of the butter in the butter icing with apple sauce - core a bramley apple and pop it in the oven on a baking tray at 180c until soft then mush up with a fork. So easy and you can put an apple or two in the oven with your cakes as they bake. Now I just need to work on my piping technique!
Bramley Apple Cupcakes
Makes 12 - 14 cakes
2 medium Bramley apples, peeled and grated
170g caster sugar
60g unsalted butter, softened
1 large egg
110g plain flour
1 tsp baking powder
2 tsp ground cinnamon
½ tsp ground nutmeg
1 tsp vanilla extract
- Preheat your oven to 180c.
- Mix the flour, baking powder and spice in a bowl.
- In a separate bowl, cream the butter and sugar together then add the vanilla and the egg.
- Fold in the grated apple. The mixture may look a bit curdled here but worry not.
- Sift in the flour mixture, a little at a time, while stirring until combined.
- Half fill your cupcake cases - I use silicone ones because they're easy and reusable (less waste, yay!) - and pop into the oven for 18 - 20 minutes or until they are cooked all the way through.
- Allow them to cool completely then top with butter icing if you wish.
Monday, 4 April 2011
Tiffin - By Royal Invitation
I’m not that big on the royal wedding. I mean, it’s always lovely when a couple in love decides to tie the knot and I’m loving the extra day off but I’m not going to be buying any commemorative mugs. My ears did prick up when I heard that Prince William is organising a biscuit cake care of McVities to accompany their traditional wedding cake.
I adore broken biscuit cake. I’m sure I ate it when I was little but it was The Boy who’s brought it into my consciousness recently. His Mum makes a mean batch of refrigerator cake (sometimes also known as Tiffin) and, after trying a slice, I decided that I had to put together my own version.
For those that aren’t in the know, it’s a seriously simple, no bake concoction which is easily adaptable depending on your tastes. Will’s cake will be made from rich tea biscuits, according to McVities Cake Design and Development head chef, but I like to use cookies. The Maryland ones are moreish but Sainsbury’s do a Basics version for a mere 45p. Don’t bother with expensive biscuits though, it’s a waste. A mixture of colours and textures can be nice. I have a vague memory that you could buy broken biscuits by the box, once upon a time, but I can’t remember where and haven’t seen them for ages.
As the name suggests, you have to break up the biscuits. I’ve tried smashing them up inside the packet which can work but sometimes the packet breaks, spraying crumbs and ricocheting chunks of biscuit everywhere. I like to add other bits and pieces, like halved glacé cherries, lumps of chocolate and marshmallows though I think this verges on becoming rocky road. It’s super tasty either way but not at all healthy...
The Royal recipe may be a state secret with McVities in direct liaisons with Buckingham Palace in order to get the recipe just right but you can always give my version a try if you’re curious.
Chocolate Tiffin (or Broken Biscuit Cake or Refrigerator Cake)
Makes 24 bite-size pieces
125g unsalted butter
4 tbsp honey
2 tbsp cocoa powder
250g biscuits
40g marshmallows, snipped into halves or quarters
10 glacé cherries, halved
100g dark chocolate
- Melt butter with honey in the microwave or over a low heat on the hob.
- Meanwhile, empty the biscuits into a clean tea towel. Gather up the ends and hold firmly so that the biscuits can’t escape then bash with a rolling pin to crush. You want some chunks of biscuit so don’t get too enthusiastic!
- Mix the cocoa into the melted butter and pour into a mixing bowl.
- Add the biscuits and mix so that they are completely coated in the buttery mixture.
- Stir in the cherries and marshmallows. It’s good to make sure that they are evenly distributed throughout the mix so that you get some in every mouthful.
- Spread into a 25cm round tin and put into the fridge to harden. This takes about an hour. I put a plate or second tin on top, weighed down with jars or cans to compress it and make it nice and even.
- When cooled, break the chocolate into chunks and melt in a bowl over a pan of boiling water. Spread evenly over the tiffin and leave to cool again.
- To release from the tin, run a knife around the edge of the tin and sink into hot water for a minute before turning out. Cut into bite-size pieces (it's very sweet!).
Tips: Store in an airtight container. Keeps for a few days before the biscuits start to absorb the butter and go soft (though this adds to the cakey goodness, in my opinion!). Add chopped nuts or raisins for a different texture. You could also substitute the biscuits for gluten-free ones which can be quite crumbly – the buttery mixture will hold them together nicely.
Tuesday, 29 March 2011
Snapshot: Eggs
I’ve been working in my current office for about seven months and in that time, two trends have been established. The first is cycling – I’ve been cycling the eight miles two and from work at least once a week since I started and gradually my colleagues have started to follow suit. The second, and more recent, is chickens. First one and then another of my colleagues has started to keep chooks in their back gardens. Office banter has turned to brooding conversations about poultry rearing. I must admit that I’m slightly jealous – if we had a garden, I’d love to have a few chickens.
Consequently, I’ve been given lots of gorgeous chicken eggs from home nurtured happy hens. Yesterday, a plea went out from our administrator who was overrun with eggs. Naturally, I volunteered to give them a good home and was presented with nine beautiful eggs (about two days of laying for her five hens).
As luck would have it, The Boy is finishing a secondment and needs to bring in the customary leaving cakes for his team so I got my baking cap on. Nine eggs turned into dinner (two fried eggs on toast), brownies, cookies and a lemon drizzle loaf.
Recipes to follow! If you're interested in rehoming ex-battery hens, please contact the British Hen Welfare Trust.
Sunday, 6 March 2011
Chocolate Orange Torte
Sometimes, just sometimes, you need to wave bye-bye to a healthy diet and indulge in a tasty (and terribly bad for you) dessert. I had an occasion, now all I needed was some afters. I perused my recipe book (where I scribble down ideas and tried-and-tested recipes) for something that wouldn't be too heavy or rich but still hit the spot. I did my very best to avoid chocolate but the inevitable happened...
Chocolate Orange Torte
(Makes around 12 ramekins)
250g dark chocolate
600ml carton double cream 2 large oranges
4 tbsp, or to taste, of Cointreau
2 tbsp unsalted butter
2 tbsp demarera sugar
1 tsp ground cinnamon
- Break up the chocolate and put into a glass bowl with about a quarter of the cream. Melt over a pan of boiling water on a low heat.
- Zest or grate the skin of the oranges while melting the butter and sugar gently together in a separate pan. Be sure to avoid the white pith which will be bitter. Add the zest to the butter and sugar then leave to simmer gently, stiring occasionally for five minutes to soften.
- Meanwhile, segment the oranges (have a look at this video if you don't know how) and place a slice or two into the bottom of each ramekin. Add a splash of Cointreau to each one if you're feeling particularly wicked.
- By now, your chocolate should be melting nicely. Add the caramalised orange peel, give it a stir and then leave to cool to body temperature.
- Pop the cream into an electric mixer with a whisk attachment on and whisk to soft peaks. If you don't have an electric mixer (I was borrowing one for this), get your whisking arm out!
- Gently fold the chocolate mixture into the cream until combined then share out between the ramekins.
- Leave in the fridge for a few hours (or ideally overnight) to firm up. Serve with chocolate shavings.
Wednesday, 23 February 2011
Caramalised Pear & Almond Cake
The finished cake!
Fancy something to warm you up and cheer you up on this boring, rainy day? A while back, I saw the lovely Hugh Fernley-Whittingstall making a delicious looking pear and almond cake on his River Cottage program. I had a bag of cheap British pears (Sainsbury's does a bag of 'Basics' for not very much money) and the dregs of a bag of ground almond leftover from making brownies so I thought I'd give it a go. I modified the recipe slightly form HF-W's original but only slightly. It freezes really well - just wrap in cling-film when cool and then pop in the freezer. Here's my take on it:
Caramalised Pear & Almond Cake
For the cake
150g unsalted butter, softened
125g golden caster sugar
2 medium eggs
75g self raising flour
75g ground almonds
1 tsp cinnamon
1/2 tsp nutmeg
For the caramalised pears
4 tiddly pears
25g unsalted butter
1tbsp soft dark brown sugar
- Preheat oven to 170C.
- Line a 20cm solid based tin with baking parchment.
- Peel, core and quarter the pears.
- Melt the butter on a gentle heat in a frying pan. Once it's completely melted, add the sugar and stir until it's mostly dissolved (I got little lumps of caramel in mine but this didn't seem to be a problem). Add the fruit to the pan and leave for a few minutes on a medium heat to caramlise turning so that it becomes golden on both sides and nicely soft.
- Meanwhile, cream the butter and sugar together until fluffy then beat in one egg at a time (HF-W recommends adding a spoonful of flour with each egg to stop it curdling though I didn't bother).
- Add the flour, almonds and spices and fold into the mixture trying to keep as much air in as possible.
- Put the mixture into the tin and then arrange the pieces of pears on top, scraping any of the buttery sugary juices on top.
- Pop into the oven for 40 - 50 minutes until firm.
- Allow the cake to cool a little and then lift the cake out by the parchment.
Find the original recipe here and a film of HF-W in action.
I'm about to have a slice with a cup of Lahloo Breakfast tea - I've been lucky enough to be picked for their Tovolo Challenge so I'm ditching tea bags and am giving loose tea a try! I'll report back on my findings...
Monday, 19 July 2010
Banana 'icecream' with pecan butterscotch sauce
If you, like me, can't be phaffed with the rigamarole of freeze-then-stir-then-freeze-
Banana 'icecream' with pecan butterscotch sauce
You will need: (serves two greedy people)
3 bananas
50g demarera sugar (or mix half demarera and half granulated)
10g butter, at room temperaure
100ml single cream, at room temperature
a handful of pecans, chopped
- Liquidise or thoroughly mash the bananas with a fork and scrape into a freezable container (I used an old takeaway container) then pop into the freezer overnight.
- Remove the banana from the freezer about half an hour before you want to eat it and get started on the sauce
- Melt the sugar slowly over a very low heat in a heavy bottomed pan. Don't be impatient and turn the heat up or it will burn which tastes horrid. As soon as the sugar starts to melt, take the pan off the heat and let it continue to melt from the heat in the pan. If it needs some encouragement, put it back on the hob but watch it like a hawk.
- Once the sugar is completely melted, add the butter and whisk.
- Add the cream and whisk again until it is completely combined.
- Stir in the pecans.
- Serve scoops of 'icecream' with lashings of sauce
Tips & Variations:
- Beware, the melted sugar is very very hot. Don't be tempted to taste it; it burns!
- Add chunks of pecan, macademia or chocolate to the bananas before you freeze the mixture.
Sunday, 15 November 2009
Waffles!
The Boy delves into a cupboard, roots around and produces a well-loved waffle iron. "We could makes waffles?" he says, rapidly suggesting that we do so the very next morn. This doesn't happen. Sunday mornings, when we are together, tend to be more about cuddles and cups of tea though the Boy is a breakfast King.
So this morning, it's just me and waffle iron. My beloved is at work - yes on a Sunday, not fair! - so I have time to experiment. Things like sandwich toasters and waffle irons seem to be the kinds of things that are bought as a cool idea but end up languishing in the depths of a dusty cupboard. If you have one, give this a try! My recipe is a variation of one found in an ancient Good Housekeeping Cookery Book (1976).
Waffles
Makes: a crispy on the outside, soft on the inside breakfast treat. Nice as a desert too.
Ingredients: (Makes about 4 waffles)
125g self raising flour
15ml/1 tbsp caster sugar
1 egg, separated
30ml/2 tbsp butter, melted
150ml milk
Equipment:
Waffle Iron (Needless to say, these get very hot. Be careful - use oven gloves or a tea towel to protect your hands if in doubt. Cleaning can be tricky. Wipe with a damp cloth while still warm to dislodge any cooked on batter. Then wipe with kitchen towel.)
Method:
- Mix the dry ingredients in a bowl.
- Add the egg yolk, melted butter and milk then beat into a smooth batter.
- Whisk the egg white until it becomes slightly stiff and fold into the batter.
- Heat the waffle iron. Open and brush with butter.
- Spoon about a serving spoon of batter into the iron (the iron I was using needed slightly more than this but see how you go). The batter should coat the bottom but shouldn't completely fill the iron
- Close the iron and. cook for 2 - 3 minutes. You can open it about half way through to see how the waffle is doing - you want it to be golden brown but not too dark.
- When it is done, remove carefully using a plastic spatula. Serve with a little butter and some maple syrup or honey.
Variations:
Serve with fresh fruit of any kind; great, of course, with blueberries or strawberries. Ice or whipped cream or chocolate sauce can work well too. You can also add a tea spoon of cinnamon or mixed spice to the dry ingredients to give the batter a bit of a kick.
Saturday, 17 October 2009
Peter's Yard
So we'd had a chilled out morning. I'd left the boy to snooze while I popped into to work (yes, on a Saturday) to get everything started. I came back to my cute little borrowed flat to find him watching one of our lazy Saturday favourites, Saturday Kitchen. It's a nice foodie way to start the weekend and normally inspires us out of bed for breakfast.Now it was a question of lunch. I'm living extremely close to the Quarter Mile project which is home to, amongst other establishments, a fantastic Swedish bakery called Peter's Yard. Again, its a place that people have waxed lyrical about so a late lunch seemed like a good enough excuse for a visit.
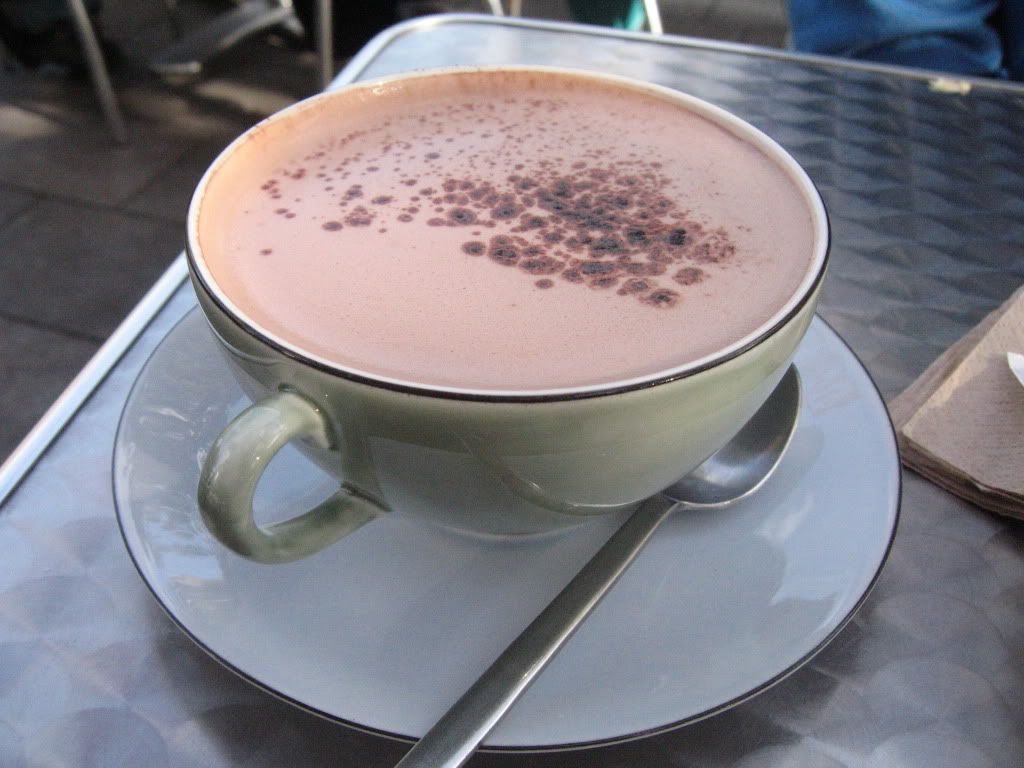
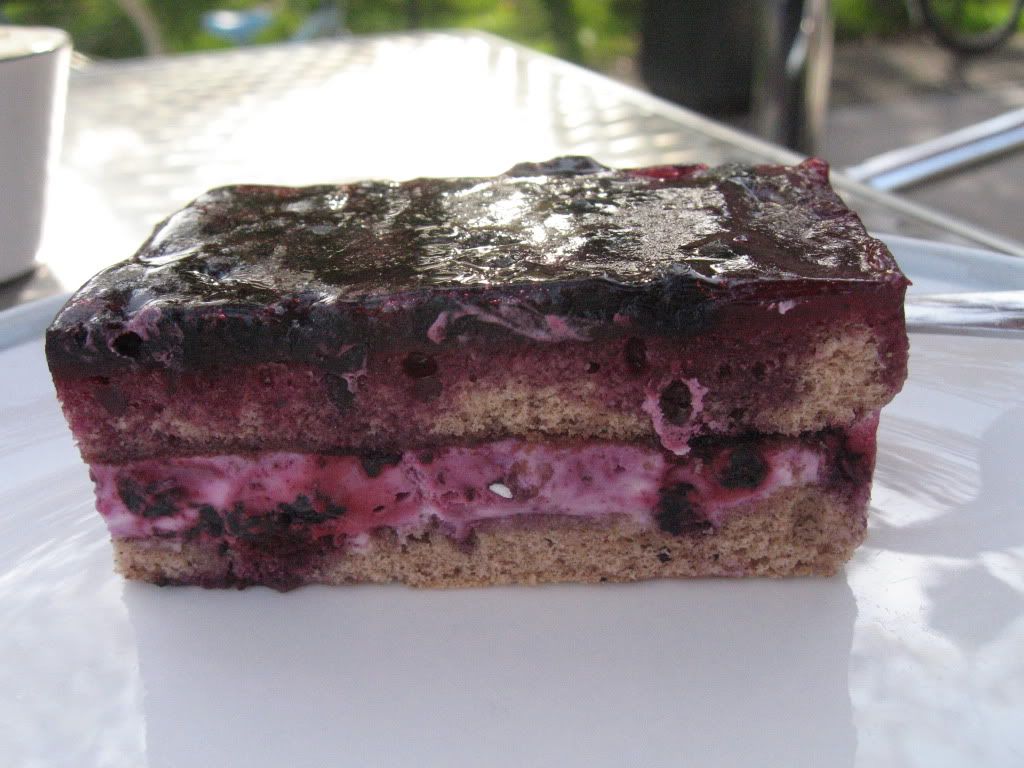
I haven't mentioned the weather yet, have I? It definitely deserves an honorable mention. It's been beautiful. Clear and sunny every day, such a treat! It's almost as if it knew I would be having a special visitor and made a real effort to be nice for us. Self-centred, eh? Anyway, it seemed natural to gravitate to the Yard's outside seating area out front. But first, we had to go in and take our picks... Peter's Yard is quietly cool inside. It's a huge dose of Scandinavian simplicity with a hint of Ikea chic. Very stylish. The food has the wow factor too. Baguettes and sandwiches laid generously thick with fillings and the most amazing cakes. I dithered. I couldn't help it! Predictably, we chose pudding first. Blueberry 'Mousse' for him and Tiramisu for I. Then the savories... hrm. I go for a turkey sandwich while the Boy goes for a cheese baguette. We managed to resist the mouth-watering smoked salmon open sandwich but only because we had a fishy dinner to look forward to. Our meal was accompanied by our usual beverage - hot chocolate!The real revelation for me was the beautiful freshness than was obvious in everything we ate. Our lunch wasn't cheap - £10 a head for two courses - but the quality and generosity of ingredients blew me away. My sandwich contained about four thick slices of fresh turkey while the Boy's baguette was stuffed with three delicious cheeses and the bread... well, it was all fantastic. Our cakes were also marvellous.

The Blueberry M0usse (above) was in fact a very handsome cake with blueberries and cream squidged between nutmeggy sponge. Quite a revelation. The only disappointment was the hot chocolate; not sweet enough for my taste.
Friday, 13 February 2009
Chocolate Pudding for Two
In need of a naughty chocolate fix for Valentines Day? This makes enough delicious mixture for two but not to worry if you're single; all the more for you! It's not too expensive (especially if you buy your chocolate from somewhere like Lidl) and you can always leave out the alcohol if you're really strapped for cash.
Chocolate pudding
Ingredients:
160g dark (70%) chocolate
130ml single cream
50ml (if desired, or to taste) Baileys (or similar)
2 tbsp sugar syrup
- Melt chocolate in a bain marie, a heatproof bowl over a pan of boiling water until smooth. Remove from heat.
- Add cream (ideally at room temperature) and stir thoroughly to combine.
- Add Baileys or similar alcohol and sugar syrup to the mix and stir well again.
- Allow to cool slightly for a few minutes until less liquid then pour into two glasses (or one big one!).
- Refrigerate until needed.
This can be made a few days in advance and can then be heated up slightly (in the microwave or in boiling water) for a tasty, naughty chocolate sauce or serve from the fridge with fresh fruit.
Subscribe to:
Comments (Atom)


